Best Travel Backpack for Photography Gear Under 40 Liters: Camera-Ready Comparison 2026
Disclosure: This post may contain affiliate links. We may earn a commission on qualifying purchases at no extra cost to you.
If you’re planning a trip with your camera, you’ve probably stared at dozens of backpack listings wondering which one actually keeps your gear safe without destroying your shoulders. The truth: most general travel backpacks aren’t built for the weight of lenses and camera bodies. They lack dividers, have flimsy padding, and distribute weight straight down your spine instead of onto your hips where it belongs. But buying a dedicated camera backpack often means sacrificing space for clothes and travel essentials.
This guide walks you through the real trade-offs between the main backpack styles photographers use on the road—and helps you figure out which one matches how you actually travel.
For most traveling photographers under 40 liters, a hybrid travel backpack with a removable camera insert balances gear protection, carry-on compliance, and everyday usability better than a dedicated camera bag alone. If you’ll rarely travel with more than one lens, a compact 25–30 liter hybrid works fine; if you’re serious and need a tripod plus backup batteries, go for the 35–40 liter size.
Who This Is For
You’re reading this if you’re planning a trip—a week, a month, a backpacking adventure—and you want to bring a camera without lugging a dedicated photo rig that screams “expensive equipment inside.” You probably own one or two interchangeable-lens cameras and a couple of lenses (or planning to buy your first mirrorless setup). You’ll fly at least one leg, so the backpack needs to fit carry-on dimensions. And you want to carry actual travel clothes, toiletries, and documents alongside your gear without your back giving out after four hours of walking.
If you’re a traveling pro photographer who brings five lenses, a lighting kit, and a drone, this guide will still help—but you might end up needing a 50+ liter bag or rolling luggage. This article assumes you’re traveling with the gear to your destination, not working every single day.
The Main Backpack Styles: What Photographers Actually Use
Dedicated Camera Backpack (30–40L)
These bags are engineered from the ground up for camera gear. They have modular padded dividers, tons of internal pockets for batteries and memory cards, and chest straps that sit high and tight. They look professional and often come with weather-resistant fabric.
The catch: they’re visibly “camera bags.” You’ll draw attention in crowded markets or transit hubs. They also tend to be shaped vertically, which means less room for bulky travel clothes. And if you’re only carrying your camera two days a week while traveling, you’re paying for features you won’t use.
Hybrid Travel Backpack with Removable Camera Insert (35–40L)
These look like regular travel backpacks but come with a removable padded insert (or allow you to buy one separately) that creates compartments for camera gear. The genius: when you’re not shooting, you pull out the insert and have more space for clothes, souvenirs, or camping gear. The bag blends in at airports. And most hybrids are built with travel weight-distribution in mind—proper hip belts, sternum straps, and breathable back panels.
Trade-off: the camera insert sits inside your main bag, so you lose some interior space compared to a standalone travel backpack of the same size. The insert padding is usually thinner than a dedicated camera bag, which means more care when packing.
Lightweight Day Pack + Small Messenger Bag Combo
Some photographers split the load: a 20–25 liter day backpack for walking around with clothes and essentials, plus a small shoulder bag (5–8L) specifically for a camera and one lens. This keeps your main bag protected at your hotel or hostel.
Why it sometimes works: maximum flexibility and minimal total weight. Why it often fails: you’re carrying multiple bags, which gets annoying. You can’t easily switch between them, and shoulder bags (even good ones) distribute weight poorly over long days.
Head-to-Head: Hybrid Travel Backpack vs. Dedicated Camera Backpack
For most traveling photographers, the real decision comes down to these two. Here’s how they stack up:
| Feature | Hybrid Travel Backpack (35–40L) | Dedicated Camera Backpack (30–40L) |
|---|---|---|
| Appearance | Blends in as regular travel bag; low profile in crowded areas | Obviously a camera bag; draws attention |
| Flexibility | Remove insert = extra space for clothes, souvenirs, camping gear | Fixed layout; always dedicated to camera |
| Camera Padding | Moderate padding; works for 1–2 lenses and a body | Thick, modular dividers; excellent for 3+ lenses |
| Weight Distribution | Hip belt and sternum strap; excellent for all-day wearing | Often chest-strap focused; can strain shoulders on full day |
| Total Weight (Empty) | 1.6–2.2 kg (3.5–4.9 lbs) | 1.3–2 kg (2.9–4.4 lbs) |
| Price Range (Typical) | $120–$280 | $110–$350 |
| Best For | Mixed-use travel; casual to enthusiast photographers | Serious travel photographers; frequent gear swaps |
Why Size Matters: 30L vs. 35L vs. 40L
The 40-liter limit exists because most airlines allow one personal item (usually a small bag, 18L) and one carry-on (22–40L depending on the airline). Going over 40L risks a gate check, which defeats the purpose of traveling light with your camera.
30 liters: Fits easily on any airline. Room for one camera body, two lenses max, basic clothes for 3–4 days, toiletries. You’ll be light on your feet and unnoticeable in crowds. Trade-off: zero margin for extras like a tripod, external battery, or extra layer. If you’re hiking or shooting for hours daily, this might feel cramped.
35 liters: The sweet spot for most traveling photographers. One body, two lenses, a small tripod, extra batteries, memory cards, and five days of clothes. Still within carry-on limits. Doesn’t look bloated when packed properly.
40 liters: Maximum airline carry-on. You can fit a decent tripod, a lightweight drone, or more clothing without overstuffing. The bag sits at the edge of acceptability; if you’re packing tightly, it might get challenged at the gate.
Pick 35 liters as your baseline. Only drop to 30 if you’re ultra-minimalist or only traveling 3–4 days; only go to 40 if you’re bringing tripod plus backup lenses.
Critical Features to Look For
1. Padded Hip Belt with Lumbar Support
This is non-negotiable. A good hip belt transfers up to 70% of your bag’s weight from shoulders to hips, where your core can handle it. After eight hours of walking with camera lenses pulling down on your back, you’ll feel the difference. Check that the belt is at least two inches wide and has ventilation or mesh backing (otherwise you’ll sweat through your shirt).
2. Removable, Customizable Dividers
Fixed dividers are rigid; you can’t reconfigure them if you buy a new lens. Look for dividers that slide in and out or use the Velcro-partition system. This way, if you travel with one lens next month and two lenses the month after, you can adjust the layout instead of fighting with the bag.
3. Access Point: Top Load vs. Side Zip
Top-loading bags force you to unpack half your gear to reach your camera. Side-zip (clamshell) designs open like a suitcase and let you grab your camera instantly. For frequent shooting, side-zip is worth the trade-off of slightly reduced water resistance at that seam.
4. Weather Resistance (Not Full Waterproofing)
You don’t need a fully waterproof bag, which adds weight and cost. Water-resistant fabric (treated nylon or Cordura) and sealed seams are enough. Pair it with a $15 rain cover you can stuff in a side pocket. In tropical monsoons, the cover handles downpours; the bag fabric handles humidity and splash.
5. Tripod Carry Straps (External)
If you’re bringing a tripod, look for exterior straps that let you lash it to the side or bottom of the bag instead of stuffing it inside. This saves internal space and keeps the tripod’s feet from poking into your lenses.
Gear Organization: How Travelers Actually Pack
Even the best backpack falls apart if your camera gear shifts around during flights or hikes. Here’s what experienced travel photographers do:
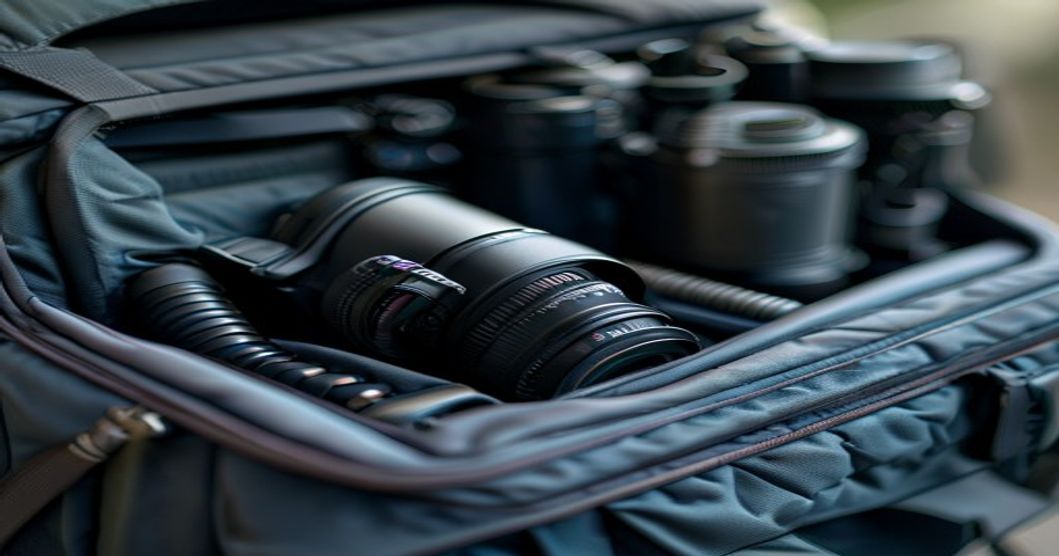
- Lenses in padded dividers. Never lay them sideways—stack them vertically so the weight sits on the back element, which is more durable than the front.
- Camera body in a small pouch. A dedicated camera cube or small padded case inside the backpack isolates it from lens elements and protects the sensor if the bag takes a tumble.
- Memory cards and batteries in a separate waterproof pouch. If moisture gets in, you want it isolated from electronics. A small waterproof bag from an outdoor store costs $8 and protects your backups.
- Cables and chargers in a tech organizer. USB cables, ND filters, lens caps all go into a small cable organizer so they’re not tangled around your camera body.
- Clothes in compression bags. Rolling is fine, but small compression bags squeeze air out and give you 30% more space without adding weight.
This strategy means your backpack doesn’t need enormous dividers; you’re creating a modular system inside. As long as the bag has one or two dedicated camera compartments and the rest is flexible space, you’ll stay organized.
Related Gear to Consider
Your backpack is the foundation, but a few extras make travel with camera gear smoother. If you’re planning an extended trip with variable weather, check out our guide on lightweight travel backpacks with waterproof compartments for tropical monsoon hiking—it covers how to handle humidity and heavy rain without a dedicated waterproof bag.
For ultra-light travelers who want to drop backpack weight even further, we’ve reviewed the best travel backpacks under 2 kg for Southeast Asia, which compares minimal-weight options that still have decent structure.
And if you’re planning jungle hikes or rugged terrain with camera gear, read our breakdown of travel backpacks with hip belts that actually distribute weight on jungle hikes—that article focuses specifically on ergo features for uneven terrain.
- Flexible: remove insert for extra space
- Blends in; less theft risk
- Better hip belt design for long days
- Works for mixed travel (photo + hiking)
- Typically $50–$100 cheaper than dedicated bags
- Thinner camera padding; less protection for fragile lenses
- Less modular; harder to reconfigure for different gear setups
- Insert may feel cramped if you’re bringing 3+ lenses
- Fewer tech pockets than dedicated camera bags
- Thick, protective padding; excellent gear security
- Modular dividers for any lens combination
- Often lighter weight (1.3–1.8 kg)
- Purpose-built: no wasted space
- Many options in the $110–$200 range
- Visibly a camera bag; attracts attention
- No flexibility if you want to pack extra clothes
- Often poorer hip belt design; more shoulder strain
- Overkill for casual photographers
- Doesn’t adapt to non-photography trips
Who This Works For / Who It Doesn’t
Perfect For
- Traveling photographers with one or two interchangeable-lens cameras
- People who hike, camp, or explore between shooting sessions
- Anyone flying more than four times a year who needs carry-on compliance
- Budget travelers who want multi-use gear (not just a camera bag)
- Solo travelers who want to stay inconspicuous in crowded areas
Not a Good Fit For
- Traveling with five or more lenses (you’ll outgrow a 40L bag)
- Using multiple camera bodies (mirrorless plus DSLR backup)
- Bringing a full lighting kit or professional studio gear
- Day-tripping only; you don’t need a travel backpack, just a shoulder bag
- Traveling to ultra-high-crime areas where a visible camera bag is a liability (even a hybrid won’t solve this; travel the opposite way or reassess your trip)
Real-World Packing Example
Let’s say you’re traveling for two weeks with one mirrorless camera body, a 24mm and 70mm lens, a small tripod, and clothes for 7 days (you’ll launder halfway through).
What goes in the camera insert: Camera body in a small padded cube, 24mm lens in a divider, 70mm lens in another, batteries and memory cards in a waterproof pouch, lens caps and cleaning supplies in a small organizer.
What goes in the main compartment: Seven days of clothes compressed into two small compression bags, toiletries in a zippered pouch, power cables in a cable organizer, documents in a thin folder, light layer (fleece or windbreaker), water bottle, snacks.
What clips to the outside: Tripod on exterior straps, rain cover in the side pocket, hat or sunglasses tucked into the top lid pocket.
Total weight when packed: roughly 4.5–5.5 kg (10–12 lbs), depending on your clothing choices and tripod weight. That’s manageable for ten-hour days of walking and shooting.
What Travelers Often Get Wrong
Oversizing the bag “just in case.” A 50-liter backpack doesn’t fit carry-on, will be heavier empty, and encourages overpacking. Stick to 35–40 liters and learn to travel light. If you need more gear, book checked luggage and a separate roller.
Buying a super-cheap backpack to save $30. A $60 camera insert that falls apart at the seams or has zero padding ruins a trip. Spend $120–$180 on a mid-range hybrid or dedicated bag and it’ll last three trips easily. That’s $40–$60 per trip—negligible.
Not testing the hip belt fit before buying online. Hip belts are highly individual. If you have a smaller frame, a bag’s standard belt might sit too high or not transfer weight properly. Try the bag on in a store if you can, or order from a retailer with free returns so you can test the ergonomics at home before committing.
Forgetting that camera gear shifts in flight. Pack your lenses with padding on all sides. In pressurized cargo holds, vibration can shift dividers. Wrapping each lens in a thin layer of bubble wrap or foam (from the camera insert padding) takes two minutes and prevents dings.
For traveling photographers on a realistic budget, a 35–40 liter hybrid travel backpack with a removable camera insert hits the best balance. You get airplane compliance, everyday comfort with a proper hip belt, flexibility to remove the insert and pack extra gear when needed, and a bag that doesn’t scream “expensive camera inside” in crowded places. If you’re bringing one camera body and up to two lenses, this setup will handle everything a month-long trip throws at you without sacrifice. Look for models with customizable dividers, a strong hip belt, and side-zip access so you can grab your camera in two seconds instead of unpacking half the bag. You don’t need to spend over $250; solid mid-range options in the $140–$200 range include all the features that matter.
Explore Options on Amazon →
Affiliate Disclosure: This article contains affiliate links, primarily to Amazon. As an Amazon Associate I earn from qualifying purchases. This means if you click a link and buy a product, I may receive a small commission at no extra cost to you. I recommend products based on genuine value and fit for traveling photographers, not commission size. All opinions are my own.